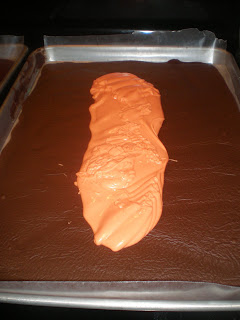
After making several batches of these for Summer and Kevin's reception(s), I figured it was time to post how to make them! The picture above is peppermint, the tutorial is orange.
What you need (per batch):
2 dark cocoa bags of melting chocolate
1 colored white chocolate bag (whatever color you desire)
oils (peppermint, orange, raspberry, almond, etc.)
Wax paper
jelly roll pan


2. Line a jelly roll pan with wax paper. Dot corners with melted chocolate, then press down.

3. Pour melted chocolate over wax paper, then spread to the edges. Try to spread as evenly as possible. Once spread, pick up pan and bang it on the counter a couple times to flatten the chocolate. You can also shake the pan back and forth lengthwise and width wise to help even it out. (If anyone is totally confused by this, let me know and I'll post a video.)
Let cool until chocolate starts to lose its shine. Then begin melting colored white chocolate. (cooling time will vary) Do not let the chocolate cool completely or the layers will not hold together.
4. When colored chocolate is melted, add 7 drops of desired oil, then pour over 1st layer of chocolate.
5. Very carefully spread to edges trying not to mix the chocolate. (obviously, I didn't do so well here.) Spread evenly, then bang pan on counter and shake back and forth as before.

7. Here is the trickiest part. Let the chocolate cool, but not completely. You'll need to cut your chocolate into pieces while it is cool enough to cut easily, but not too soft that it gathers along the knife. You'll have to experiment with this. Once it is all cut, you can peel the chocolate off and store in zip lock baggies. I put my mints in the fridge to finish cooling, then peeled them off. (hence the white-ish looking chocolate) I like these best stored in the freezer. Then it's a cool treat when you most need it! Enjoy!


1 comment:
Wow, I'm impressed! You are so gourmet!
Post a Comment